
How Can I Determine the Specifications of My Power Supply Unit?
In today’s computer-driven world, ensuring the proper performance of your system requires attention to the Power Supply Unit (PSU). Whether you’re a casual user or an experienced one, understanding how to check your power supply is essential for troubleshooting issues, upgrading components, or ensuring compatibility with new hardware.
Navigating PSU specifications may seem daunting, but it’s a straightforward process crucial for your system’s smooth operation. There are various methods available to check the power supply unit of any computer effectively.
If you’re eager to learn how to check what power supply you have, you’ve come to the right place. In this guide, we’ll explore everything you need to know about this vital component.
Why Is Your PSU Not Working?
Several red flags indicate a malfunctioning PSU that requires attention:
- PC Not Starting: If your computer fails to start and remains silent when you press the power button, it may indicate a PSU issue.
- Stability Issues: Immediate shutdowns during operation suggest inconsistent power supply, potentially caused by PSU problems.
- Burning Smell: A burning smell emanating from your PC signals electronic component issues, necessitating immediate shutdown.
- Excessive Noise: Overheating PSU can cause increased fan noise, indicating potential malfunctions.
While these issues may not solely stem from PSU problems, it’s essential to consider them in troubleshooting your system.
How to Check What Power Supply You Have?
There are several methods to check your power supply effectively:
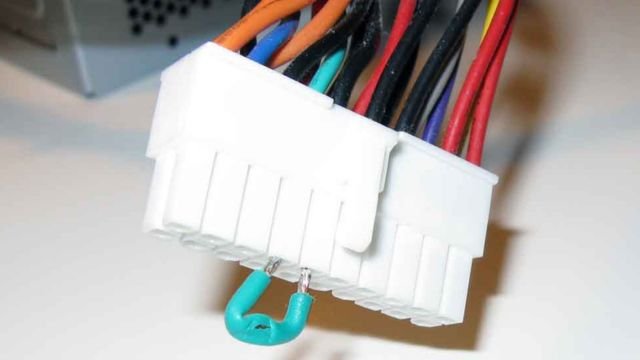
Using a Paper Clip:
- Power off your PC and disconnect the AC power cord.
- Open the computer case and locate the 20/24 Pin connector on the motherboard.
- Straighten a paper clip and shape it into a “U” configuration.
- Insert one end of the paper clip into the green pin and the other end into any black pin on the 20/24 Pin connector.
- Turn on the power supply and check if the fans start. If they do, your PSU is functional; otherwise, it may be dead.

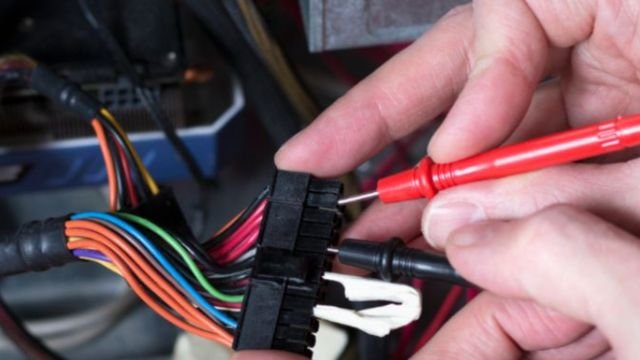
Using a Power Supply Tester:
- Purchase a Power Supply Tester from an electronics shop.
- Shut down your PC and disconnect all power sources.
- Open the computer case and connect the 4-pin and 24-pin power connectors from the PSU to the tester.
- Activate the switch and plug the power source into a wall outlet.
- Turn on the power supply and check the readings displayed on the tester to determine voltage and other values.
Read also:
- Age with Grace: 10 Trending Technologies Revolutionizing Senior Care
- Driving Success: Unleashing the Power of Digital Marketing in the Automotive Industry
Conclusion:
Regularly checking your power supply unit specifications is essential for computer maintenance and troubleshooting. Understanding how to verify your PSU specifications empowers you to address potential issues effectively.
Thank you for choosing Trek And Discover as your go-to source for staying updated with the latest news and trends. Stay informed by exploring our website for daily buzz-worthy updates, and don’t forget to subscribe for regular updates delivered straight to your inbox.